

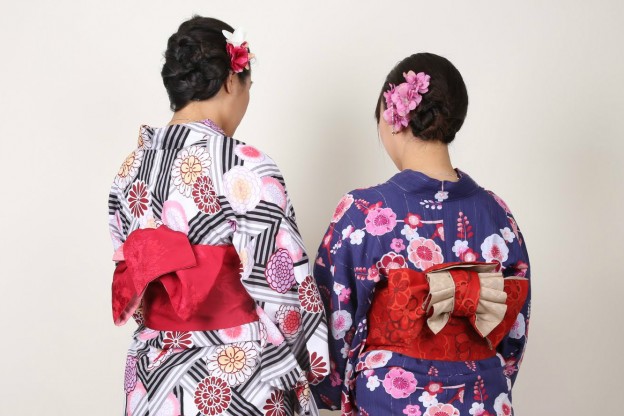
Do you know how to tie Obi for yukata?
Here I want to introduce the most basic sash (obi) style, which called ‘Bunko Bow’ or ‘Bunko Obi’ !! \(^▽^)/
You can use it regardless of age. This is the basic bow to master before moving on with other styles which more difficult. Let’s try to learn it!
.
.
.
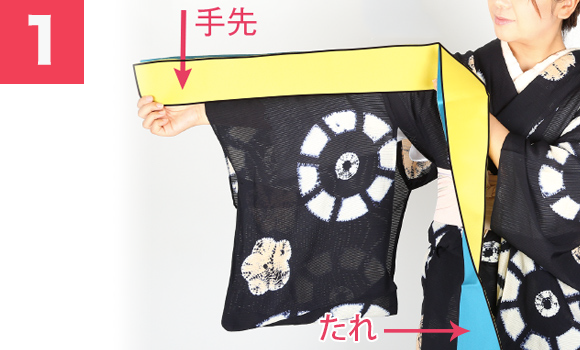
1. Take 60cm (an arm length) of one end of the obi
and fold its width in half. We call the folded part
‘tesaki’ and the part rolled around your waist ‘tare’.
.
.

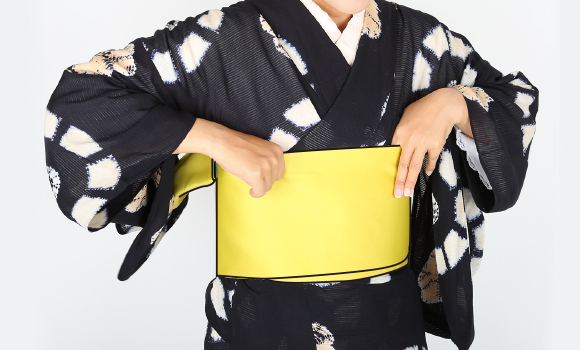
2. Put tesaki over your right shoulder, keep this
part with a clip; Then, begin wrapping tare part
around your back over the kimono blousing.
.
.

3. Carefully tie tare around your waist once or twice (depends
on your size) keep the obi not to slip down.
.
.
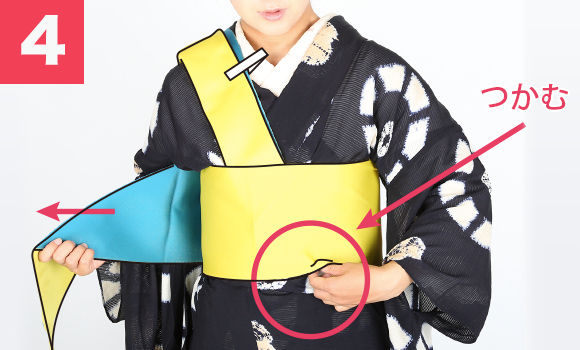
4. Hold the other end of the obi with your left
hand tightly and pull the obi horizontally by your
right hand.
.
.

5. As doing step ④ , roll the obi to your
stomach and fold it up in oblique direction
(see the dot line)
.
.
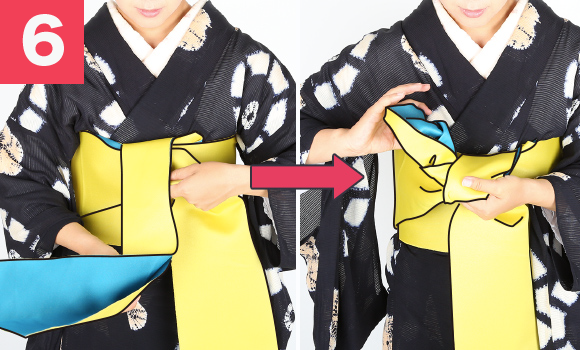
6. Take tesaki and tare together, tie a simple knot.
.
.

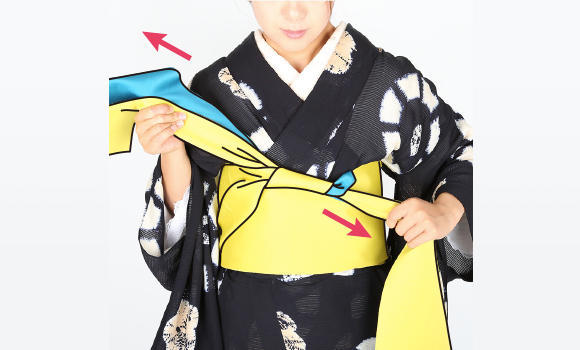
7. Twist it to the opposite direction in order not to come loose.
.
.
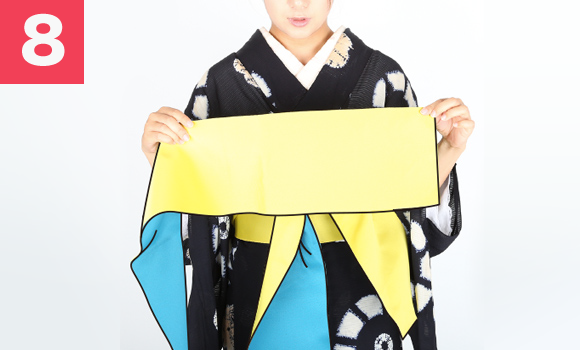
8. Fold the end of tare with length of your shoulder (this is width of the completed ribbon) and roll it up.
.
.
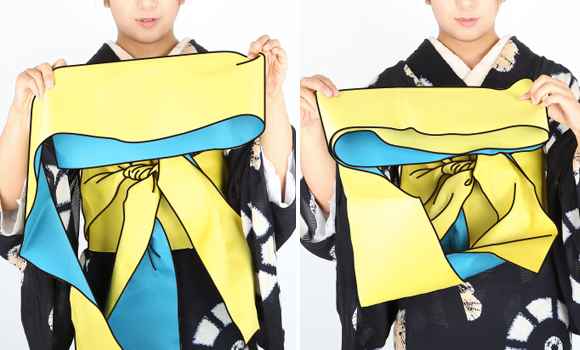
9. Pinch the roll in the center.
.
.
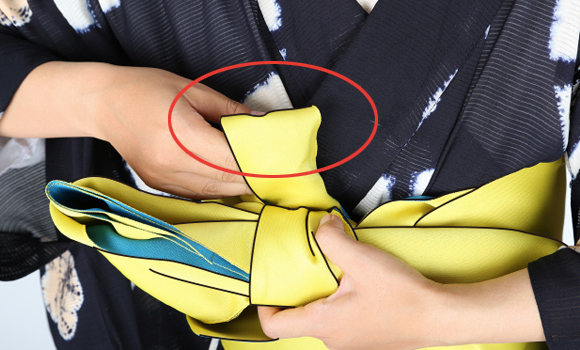
10. To make a ribbon, put tesaki down over the pinch, tuck inward and wrap around the pinch twice.
.
.
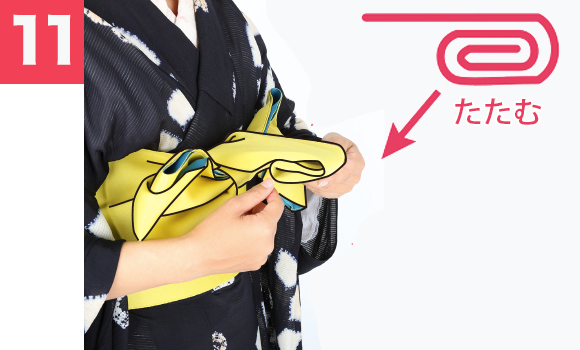

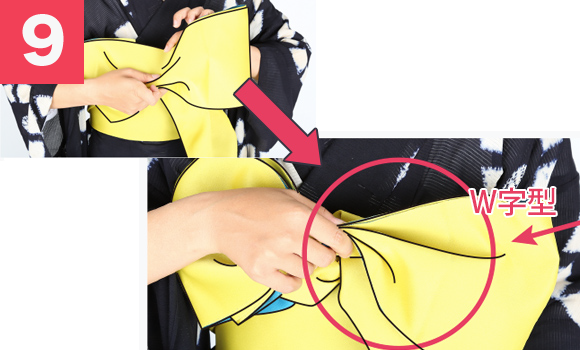
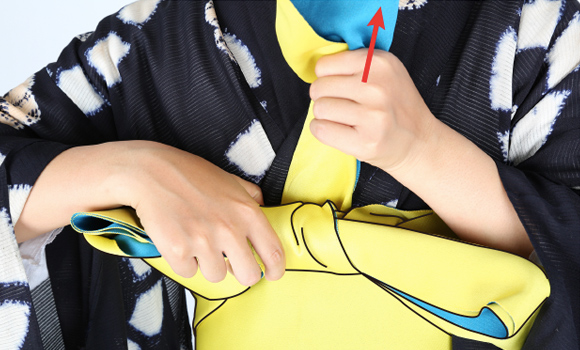
11. Fold up the rest part of tesaki and hide it under the ribbon.
.
.
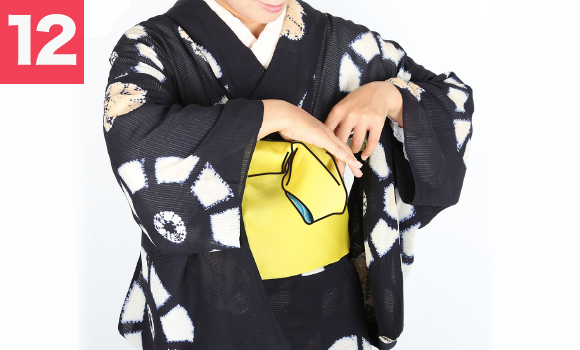
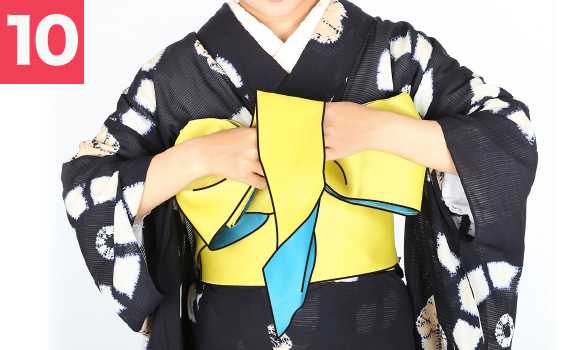
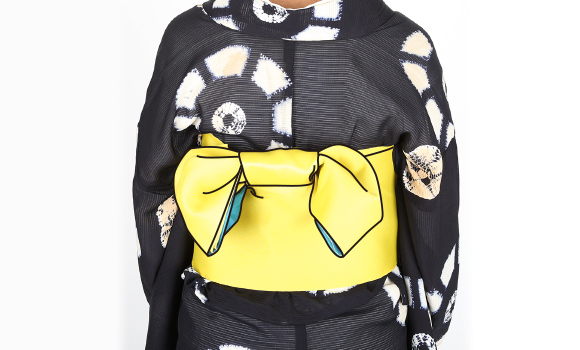
12. To finish, adjust the ribbon shape, turn the bow to right side to your back, and FINISH!!!
.
.
 .
.
.
.
.
How do you think? It’s not that hard to make this bow if you have been used to it. If you’re willing to see the real one, come to our stores and see how the professional do it for you. Check for another articles here ^^